
 Yahoo Finance
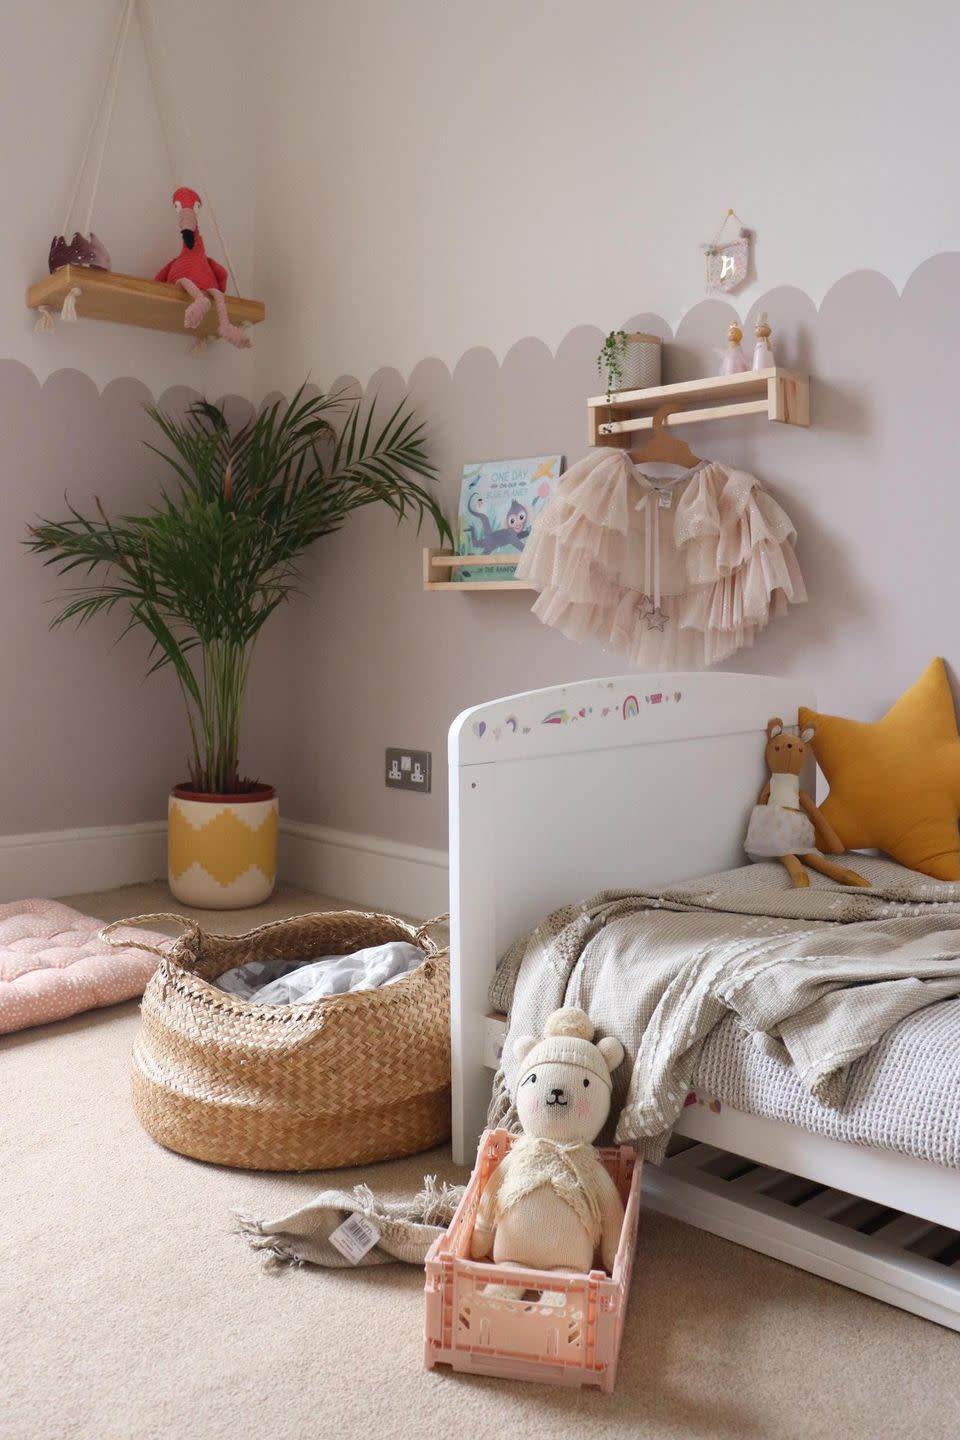
Step-by-step: How to paint a scalloped wall like a pro
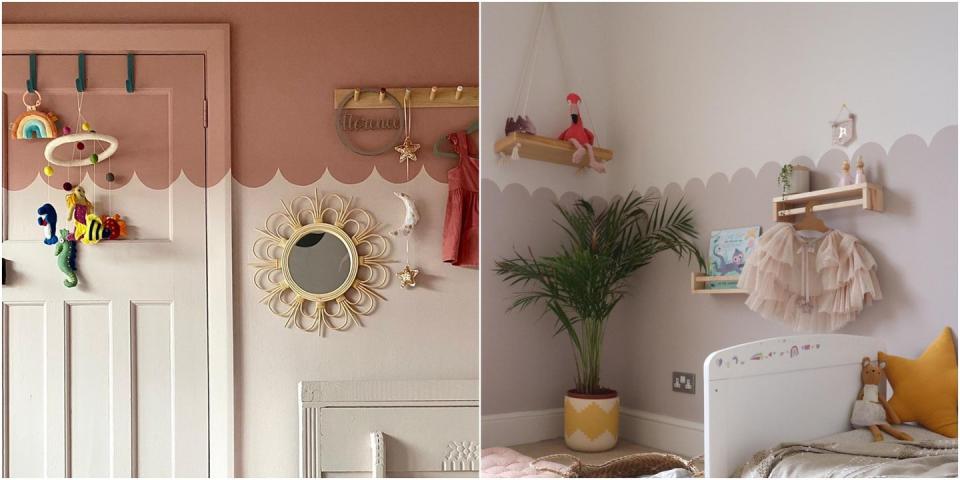
The scalloped wall is a popular Instagram trend that's a great way to refresh tired walls or zone spaces.
'A scallop wall is a great way to make your space unique and inject some fun, lively energy into a room,' Marianne Shillingford, creative director of Dulux, says. 'Often seen in nurseries, scallop walls work just as well in a sophisticated living or dining room.'
When painting a scalloped wall, Marianne says you should let the top colour overrun up across the ceiling to create a sense of being utterly cocooned in comfort. And while this feature wall idea is relatively easy to do, you should plan the design carefully before starting and visualise how the whole room will look with the new design.
If you have a tall ceiling...
'If you have a large space with high ceilings, placing the scallop line three quarters up the wall helps create a cosy feeling, bringing the ceiling down to envelope you,' Marianne suggests.
If you're painting within a compact space...
Marianne recommends: 'If you're working with a small space, opt for placing the line in the middle to avoid making the room feel smaller. Painting the skirting boards in the same shade as the bottom half also helps maximise the space you have.'

If you don't want to paint an entire wall...
You don't have to paint a whole wall to get in on the trend. Marianne says: 'A more subtle way of using the scallop design is around a door or along the top of the skirting board where it's a fun little element that will make you smile every time it catches your eye.'
What you'll need:
Dulux Simply Refresh emulsion (choose your two favourite colours)
Round plate
Large piece of thin card
Scissors
Coloured chalk, string and drawing pin
Spirit level and ruler
Masking tape
Small foam radiator roller
1" or 2" good quality acrylic paint brush
Artist's brush
Before you start, Marianne suggests practicing on a piece of painted lining paper or part of a wall that you haven't yet painted. 'No one gets perfect scallops without a bit of touching up at the end so don't worry and just have fun,' Marianne says.
Follow this step-by-step:
1. Paint the wall in your chosen background colour.
Top Tip: Use Dulux Simply Refresh colours to get the look in just one coat.
2. Make your own scallop template by drawing round a plate onto thin cardboard (craft card or old cereal packets taped together are perfect). Position the plate so half of it sits on the top edge of the cardboard and aim to draw at least 3 scallops in a row.
3. Cut them out neatly so you have a continuous scallop shaped template.
Top Tip: Make two or three templates if you plan to use them as stencils.
4. Decide what height you would like the scallop detail to be and draw a straight horizontal line across the width of your wall with a piece of coloured chalk, using a spirit level and ruler to make sure it is straight. Apply masking tape along the the chalked line and paint with the scallop colour.
Top tip: Use string and coloured chalk to create quick easy straight lines to follow. Cut length of string that is a little longer than the wall you are working on. Pull the string across the chalk a couple of times, so the string gets covered in colour. Make a knot at one end and put some masking tape in front of the knot. Measure and mark the height you want at either side of the wall and then stick the knotted string to one of the marks. Take the other end of the string and pull it all the way to the opposite mark, pull tight against the wall and then snap it to create the perfect horizontal line. (Watch a video tutorial here).
5. Use masking tape to position your template along the painted line so just the points of each scallop touch it. You can now either use it as a template to draw the scallops directly onto the wall and then paint in with a small brush, or use it as a stencil and apply paint directly over the stencil using a small foam radiator roller.
Top tip: If you use a brush, make sure it's a good quality acrylic 1" or 2" brush, and if you use a roller make sure the paint is evenly distributed in the foam and it's not overloaded or it will creep under the edges. Have a small artist's brush handy to touch up any mistakes.
Follow House Beautiful on Instagram.
You Might Also Like
